How to Make Your Own Sourdough Starter: A Beginner’s Guide to Wild Fermentation
If you’ve ever tasted a slice of warm, tangy sourdough bread and thought "I wish I could make this myself," you’re in the right place. Sourdough isn’t just bread—it’s a living, breathing relationship between you and wild yeast. And the magic begins with your starter.
Making your own sourdough starter is simpler than you might think. All it takes is flour, water, and a little patience. Let’s walk through the process.
What Is a Sourdough Starter?
A sourdough starter is a fermented culture of flour and water that captures wild yeast and bacteria from the environment. These microorganisms help your bread rise naturally, without commercial yeast. Over time, the starter develops that classic tangy flavour and helps improve the digestibility of the bread.
What You’ll Need:
Flour: Start with wholemeal/whole wheat flour (for best fermentation). You can switch to white flour later if preferred.
Water: Filtered or dechlorinated (chlorine can inhibit fermentation).
A jar or container: Glass works best.
A spoon or chopstick
A clean cloth or paper towel and a rubber band
Day-by-Day Sourdough Starter Instructions
Day 1
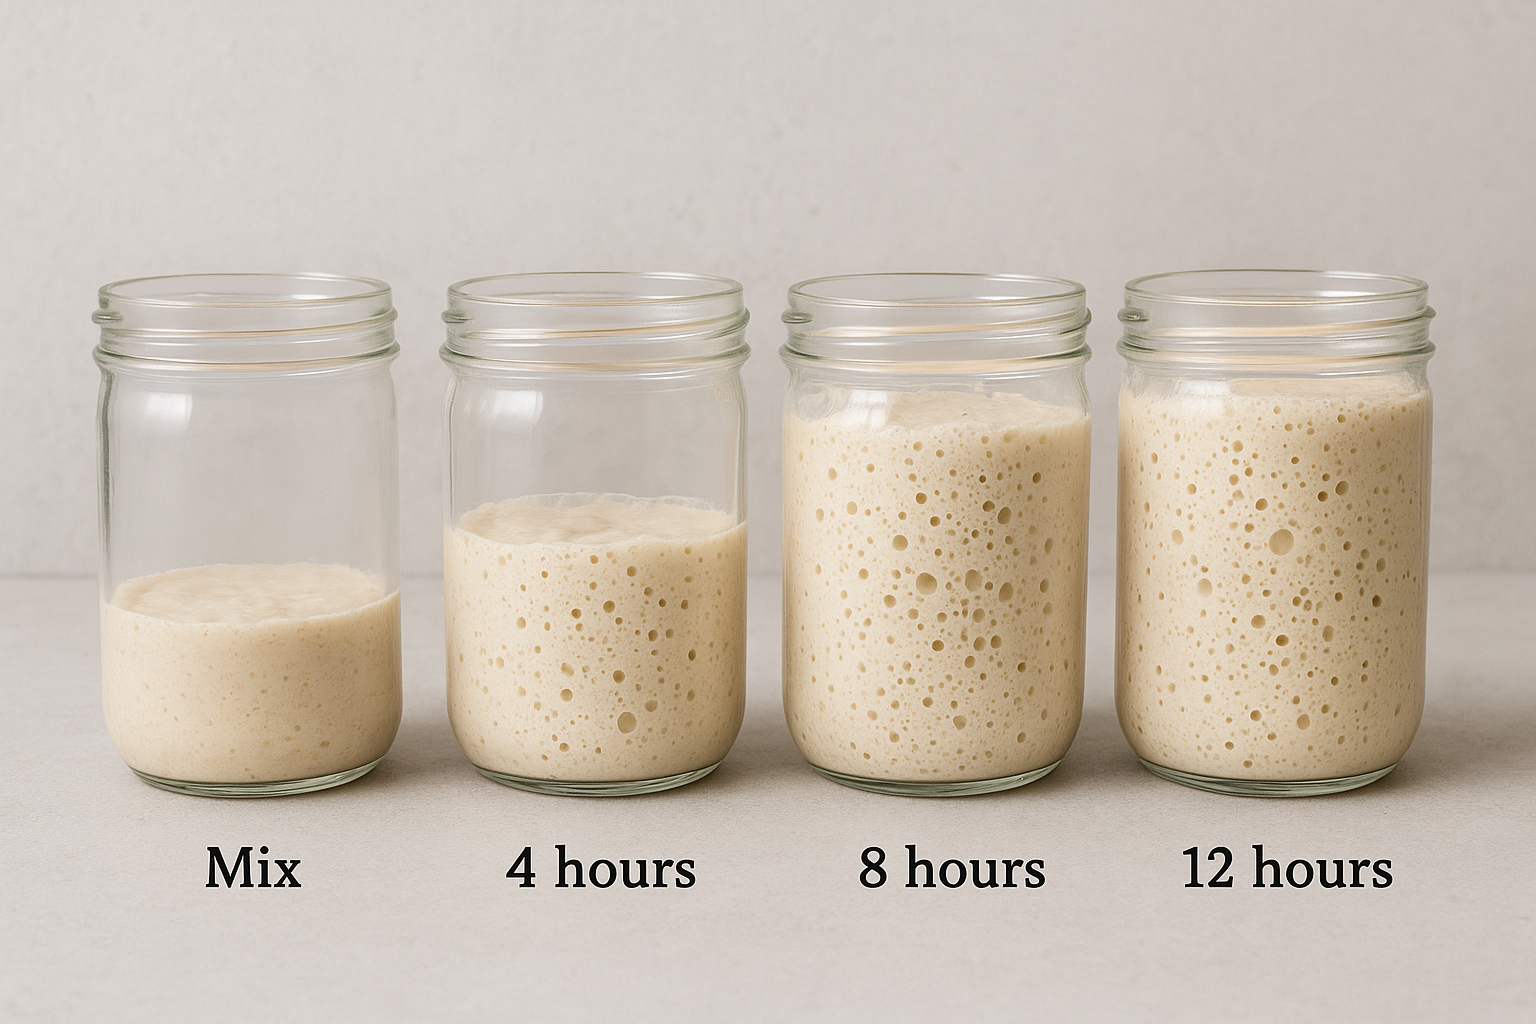
Mix ½ cup whole wheat flour with ¼ cup water in your jar. Stir until smooth. Cover loosely and let sit at room temperature (20–25°C) away from direct sunlight.
The progression of sourdough starter on the first 12 hours.
Day 2
You may see a few bubbles. Discard half of the mixture and feed it again: add ½ cup flour and ¼ cup water. Mix well.
Day 3–4
The starter should start to smell tangy or fruity and bubble more. Repeat the same feeding process once every 24 hours: discard half and feed with fresh flour and water.
Day 5–7
You should see it double in size a few hours after feeding. It should smell pleasantly sour (like yogurt or beer). This means it’s ready to use!
Pro Tips:
Consistency is key. Feed your starter at the same time each day.
Smells matter. A healthy starter smells tangy, not rotten. If it smells foul or grows mold, start over.
Discard doesn’t mean waste. Use the extra starter to make pancakes, crackers, or add to compost!
When Is It Ready?
You’ll know your starter is ready when it consistently doubles in volume within 4–6 hours of feeding and passes the float test—drop a spoonful in water, and if it floats, it’s ready to bake!
Why Start Your Own?
Making your own starter connects you to an ancient tradition and aligns with the Equinox philosophy of conscious, sustainable living. Plus, it’s cheaper and better for your gut microbiome than store-bought bread.
